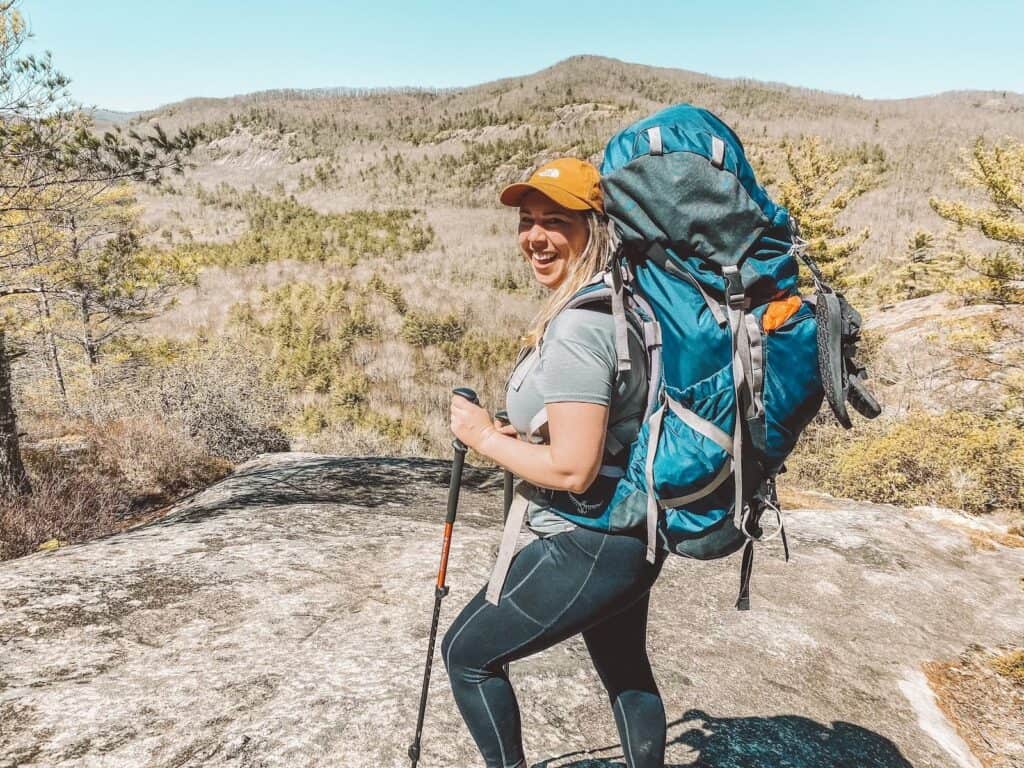
Is backpacking on your bucket list? Do you dream of sleeping under the stars and waking up to mountain views, exploring the backcountry that day hikers never get to see?
Backpacking is an incredible experience, and one thats changed my life in amazing ways! But backpacking for beginners can be super intimidating.
When I first started my backpacking journey 2 years ago, I was overwhelmed by everything – what kind of gear I needed, where to go, and yes, how to 💩 in the woods.
Since then, I’ve backpacked over 100 miles (mostly solo), doing section hikes on the Appalachian Trail, Colorado Trail, Pacific Crest Trail, and thru-hiked the Trans-Catalina Trail in 2024.
This guide covers the 15 most-essential tips for backpacking I wish I knew as a beginner, so you can hit the trail safely and with confidence your first time backpacking.
Update: This post was originally sponsored by World’s Best Adventures, who sadly, are no longer in business. I’ve linked to several other guided backpacking companies – below – although I haven’t personally tested them out. If anyone has recommendations for guided backpacking tours – drop a comment below! This post contains some affiliate links, which means if you buy something, my blog will receive a small commission at no extra cost to you.
1. Pick a Beginner-Friendly Route
The best backpacking tips start way before you ever hit the trail! Choosing the right route is make-or-break for a first-time backpacking trip.
Instead of planning a 30-day trek through the Sierra Nevadas, start with something more manageable.
Opt for a trail rated as easy to moderate, avoiding those with significant elevation gain or challenging terrain like rock scrambling, or areas with ice and snow.
On your first backpacking trip, you’ll already be adjusting to carrying a 25+ lb pack, filtering water, and sleeping outdoors. Now probably isn’t the time for your first 20-mile day, too.
Looking for a good beginner-friendly mini thru-hike? Consider backpacking the Trans Catalina Trail in California!
Decide How Many Days You Will Hike
If you’re new to backpacking, aim for 1-2 nights in the backcountry initially. My first trip was 3 days and 2 nights, a good length to get used to trail life without being overwhelmed.
Limiting your nights also helps reduce your pack weight, making your first experience physically easier.
Decide How Far You Will Go
Most backpackers walk at about 2 miles per hour. A good backpacking tip is to keep your daily distance between 5 to 10 miles to avoid exhaustion.
Even as a regular hiker of 6+ miles, I found a 5-mile backpacking day quite tiring at first. Over time, I built my endurance to handle 10 – 15+ miles a day.

Where Will You Camp?
You can’t just camp anywhere. Some areas only allow backcountry camping in designated spots.
Research regulations ahead of time and plan your camping spots. Guidebooks and backpacking apps are great for finding established campsites along popular trails.
If you’re in a National Park, State Park, or National Forest, a good guidebook or topo map provides all necessary details for planning.
Apps I’ve used include:
- FarOut Guides, great for trail maps with water sources, campsites, and elevation profiles. Useful for trails like the Colorado Trail / CDT, PCT, and TCT.
- AllTrails+ is great for day-hikes but also offers details on campsites and trail conditions for backpacking routes. The paid version allows for offline map downloads.
Need a map? Don’t forget to download your map and save it to your phone or GPS device before your hike! Get AllTrails Plus or AllTrails Peak (the most used trail app on my phone!) to download all your trail maps for offline use. Use my promo code brookeinboots30 to get 30% off your annual AllTrails subscription!
- Gaia GPS turns your phone into a navigation tool with GPS and topo maps. While not as beginner-friendly as AllTrails, its advanced features are valuable once you’re more experienced.
2. Check Weather Forecasts
Before starting out on your first backpacking trip, make sure to check detailed weather forecasts for the duration of the trip. Take note of possible of storms, cold fronts, heat waves, and wind conditions.
Before my first trip, I kept an eye on a rainstorm headed our way. Thankfully, we were all prepared for a soggy first day out on the trail when the storm did hit, and got to hike through beautiful clear skies the next day.
What I didn’t check for was the wind. While the temperature never dropped below the 30’s, windy conditions plunged the perceived temperature into the 20’s, making for a very chilly night! If I had checked, I probably would have packed some warmer gear.
Remember that conditions can change quickly, especially in the mountains and desert. Even if the forecast calls for clear skies, bring a rain jacket or emergency poncho just in case.

3. Physically Prepare for Your First Time Backpacking
My biggest worry before my first backpacking trip was how my body would physically handle lugging a 30+ pound backpack over 15+ miles and several thousand feet of gain.
Thankfully, I spent a few weeks leading up to my trip doing some basic strength training, particularly my legs, shoulders and back, and cardio endurance training.

At a minimum, make sure that you’re comfortable hiking the distance and difficulty of your planned trip with lots of similar day hikes.
If you already own your own pack, wear it during your day hikes, and make sure it is loaded with the weight you plan on backpacking with, usually around 20 – 30 lbs.
Read more about backpacking training tips for beginners here.
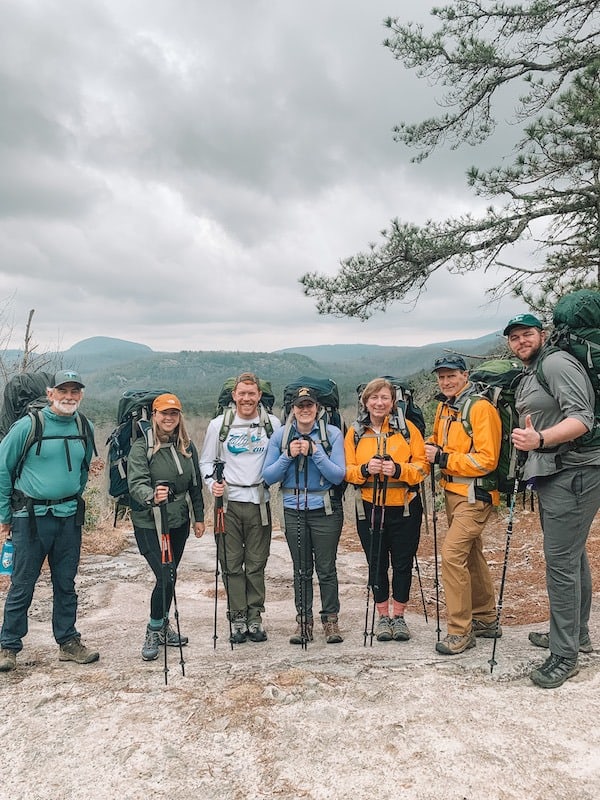
4. Go With a Friend or a Guided Backpacking Tour
The easiest way to get started backpacking is to go with a friend who already backpacks! Ask your outdoorsy friend if they wouldn’t mind showing you the ropes – they’ll probably be more than thrilled to take you on your first trip!
No one to go with? If none of your friends fit the bill, there are tons of beginner-friendly backpacking tour groups and guides around the United States (and the globe).
A bonus of going with a guided group is that many of them can provide the gear and equipment you’ll need, so you don’t have to buy or rent tons of new gear when you’re just starting out.
In fact, a huge reason why I had never backpacked before was because I didn’t have the necessary backpacking gear, and I didn’t want to spend hundreds of dollars (or more!) on gear I wasn’t 100% certain I’d love.
Choosing an all-inclusive backpacking guiding company saved me all the hassle (and tons of $) because the price includes basically everything.

A guiding company can provide quality backpacks, tents, sleeping pads, cooking supplies and most importantly, a reliable and experienced guide.
When choosing a backpacking company, make sure you pick guides who have plenty of experience backpacking in the area you are headed.
Not only does this help ensure your safety, it also means you’ll have a huge amount of backpacker knowledge available 24/7 on your trip.
Unfortunately, the backpacking tour group I went with is no longer in business. Here are 3 guided backpacking groups I would recommend at this time (although I haven’t had personally gone with any of them – yet!)
- REI – The OG. REI has dozens of guided backpacking tours, including women’s only and specialty tours, led by REI guides or trusted local guides.
- Explorer Chick – Adventure travel tours for women, included guided hiking, backpacking, National Parks and international Travel.
- Wildland Trekking – All-inclusive guided hiking and backpacking trips in some of the most iconic places in the US and around the world.

5.Plan Your Meals (and Don’t Forget Snacks!)
Planning meals for backcountry trips can be tough for new backpackers. You’ll carry all your food and cooking gear, so it’s key to plan meals and snacks ahead. Here is some of my favorite backpacking advice when it comes to food:
Food Tips for Backpacking
Choose foods that are high in calories but lightweight. Skip heavy cans and bulky items, opting for nonperishable, calorie-dense options. Hiking burns at least 3,000 calories a day, so you’ll want to pack 2,000-3,000 calories per day.
Here’s my full-day trail menu:
- Breakfast: Oatmeal + Instant Coffee
- Snack: Pop Tarts + Hydration Mix
- Lunch: Flavored Tuna packets, tortillas with hazelnut chocolate spread or peanut butter
- Snacks: Beef jerky, granola bar
- Dinner: Dehydrated backpacking meal + Snickers candy bar
Cooking Supplies
A simple backpacking stove, like the MSR PocketRocket or Jetboil Flash, can boil water quickly for coffee or meals, and weigh less than 1 pound. Pair it with a lightweight pot (included with Jetboil), camp mug, and long spork for a full kitchen setup.
Looking for more gear advice? Check out Backpacking Gear For Beginners and grab my free backpacking checklist and favorite gear suggestions – perfect for beginners!
Always cook outside to avoid carbon monoxide poisoning or fire!

6. DON’T Overpack
Overpacking is probably #1 mistake that backpacking first-timers make.
When you have to carry everything on your back, its easy to underestimate how much your total pack will weigh! Aim for a pack weight of around 20-35 lbs for a 3 Day /2 Night trip – or less!
For your first trip, stick to the following essentials. Once you have some experience under your belt, you’ll be able to gauge how much, or how little, you feel comfortable carrying.
Backpacking Packing List for Beginners (get the full list & more favorite gear suggestions here)
- 50+ L Backpack
- Hiking Shoes / Boots
- Clothes: Socks, Moisture Wicking Shirts, Hiking Pants, warm base layers (double as sleeping clothes), gloves and hat, moisture-wicking underwear
- Rain jacket (rain pants optional)
- Down or Fleece Jacket
- Sleeping Bag + Sleeping Pad
- Backpacking Tent
- Water Bottles + Water Filtration System
- Sunscreen, toothbrush/toothpaste, cleansing wipes, deodorant, hand sanitizer + any medications
- Toilet Kit: Toilet Paper or wipes, Kula Cloth / pee rag, trowel, trash bag for “used” items.
- Knife / multitool and emergency gear repair (duct tape, or Gear Aid tape)
- Headlamp
- Trekking Poles
- Waterproof backpack cover + waterproof dry bags (or ziplocks)
- Camp Stove, lighter, food, and wildlife-safe food storage system
- First Aid Kit
- Blister Care (use Leukotape or Moleskin on hot spots before the blister forms. Use bandaids and Neosporin on an open wound)
- GPS + Map
- Phone / Camera + Portable Charger
- Camping Pillow
- Camp shoes
Need help packing for your backpacking trip? Get my favorite backpacking gear suggestions that I use and love on the trail, delivered right to your inbox! Plus a backpacking checklist so you always pack exactly what you need!


7. But Don’t Under Pack
I was so worried about overpacking that I UNDER packed for my first backpacking trip! Next time, I will pack some more substantial wool base layers as well as a fleece and down jacket when backpacking in the early spring.
I also recommend bringing headphones, and a few audio books or e-books downloaded to your phone. Some hikers also brought playing cards for some post-dinner entertainment. Light sleeper? Don’t forget some ear plugs to shut out the noise of your fellow hikers.
8. Re-wear Your Clothing
One of the best ways to save weight is to rewear your clothes. While you may cringe at the idea of rewearing your sweaty hiking clothes multiple days in a row, I promise its one of the first things you’ll get used to on the trail – especially when you see everyone else doing the same!
That said, I was plenty glad for a fresh pair of underwear every day and suggest you do the same for your first trip. I also brought an extra pair of socks for sleeping and to protect my feet from sweat-induced blisters.
Backpacking Tip for Beginners : Wear your clean, warm, base layers to bed.
To help with hygiene, make sure to bring clothes that are moisture wicking and antimicrobial.
9. Carry a GPS and Personal Safety Device (and have a way to charge them!)
I always carry my Garmin InReach Mini while hiking and backpacking. This mini satellite communicator allows you to contact emergency search and rescue if something truly terrible were to happen.
Not only did I love the extra peace of mind of knowing that I could access Search and Rescue, I was able to text my husband goodnight every night, and let him know we were doing OK! ☺️
If you aren’t going with a guided tour (and even if you are), I highly recommend also bringing a GPS equipped device and a map.
Lastly, don’t forget a power source for any of these important items! While my Garmin InReach can last many days without a charge, I brought a small battery pack to keep my phone (which is also my camera, e-book, ect.) charged.

10. Know How to Protect Your Food and Gear from Wildlife
An easy, but dangerous, mistake that beginner backpackers make is forgetting to properly secure any food or scented items – yes including your toothpaste, trash, and other toiletries.
Properly securing your food is about more than just avoiding a hungry critter making off with your dinner, it can be the difference between life and death – for hikers AND wildlife.
Animals who associate humans with food may become aggressive towards people, causing serious problems with tragic outcomes. Large predators, like bears, who become aggressive looking for human food must occasionally be euthanized to protect campers and hikers. By properly storing food you save bears, coyotes, and other wildlife from a tragic fate.
Research any food storage recommendations and requirements along your backpacking route. Use bear boxes and cables where available, and store belongings in scent-proof bear canisters and bags.
11. Keep it Clean!
Backpacking is a messy endeavor. Make sure to follow these backpacking hygiene tips for beginners to stay clean, safe, and sane on the trail:
- Sanitize frequently! Have hand sanitizer available and use it before and after using the bathroom, eating or cleaning any cuts and scrapes.
- ALWAYS camp, clean, and use the bathroom 200 feet from the trail and water sources.
- Follow Leave No Trace Principles when it comes to using the bathroom.
- Take wet clothing off at the end of the day and change into dry clothing. Wet clothes can cause blisters and all sorts of infections.

12. DON’T Ignore Your Feet
If you take care of your feet – your feet will take care of you! Your feet are your most important asset to protect when backpacking. After all, they’re your only form of transportation!
Backpacking Tips for Beginners: IMMEDIATELY address any foot discomfort, like rubbing, hot spots, or pain. Blisters can be incredibly painful, and the best solution is to prevent them in the first place.
If you start to feel rubbing or a “hot spot” forming on your feet (or anywhere else), it’s best to immediately stop and address it.
Put medical tape (Leukotape is a favorite among backpackers & hikers) or Moleskin on hot spots before the blister forms. If you end up with a blister anyway, carefully treat any open wound with an antibacterial ointment and keep it covered with a bandaid.
Don’t put medical tape directly onto an open blister, as you might tear the skin off – ouch!
Buy and wear quality hiking socks. I prefer wool socks from Darn Tough or Smartwool. Wool is moisture wicking and naturally antimicrobial.
A good beginning backpacker tip is to bring at least one extra pair of socks when backpacking.
Keep your feet and toes clean and free of blister-causing debris. If weather permits, consider letting your feet air-out in the sunshine for a bit, or bring “camp shoes” – lightweight sandals to wear after you’re done hiking for the day.

13. Stay Hydrated
If you’re backpacking for more than 1 night, you’re most likely going to need to find and filter your own water.
Most hikers use the Sawyer water filter system (which conveniently can be screwed onto the top of a SmartWater bottle) or similar filter system. I use my Sawyer Squeeze paired with a CNOC Vector 2L bag to collect and store water for filtering.
Backpacking Tips for Beginners: ALWAYS designate your “Clean” and “Dirty” water containers and don’t cross contaminate!
For your first backpacking trip, I recommend hiking in an area with reliable and frequent water sources. Camp near (but more than 200 feet from) a water source and filter water before and at the end of each day.
Research and practice using your water filtration system before hitting the trail.

14. Understand and Practice Leave No Trace
Backcountry camping and hiking is an extraordinary opportunity to connect with nature. But it also means more opportunities to leave a negative impact on the wilderness around you!
Before heading out on your first (or second, or third…) backpacking trip, take a moment to review the Principles of Leave No Trace:
- Plan Ahead and Prepare – When you know exactly what to expect, you are more likely to have a fun, sustainable, and safe adventure.
- Travel and Camp on Durable Surfaces – Stick to trails and established campsites.
- Dispose of Waste Properly – Pack it in, pack it out. This applies to all trash, leftover food, and toiletry waste.
- Leave What You Find – Preserve the past and the present. Leave rocks, plants, archaeological artifacts, and other natural and cultural features as you find them.
- Minimize Campfire Impacts – Know and obey all wildfire regulations, and make sure any campfires are COMPLETELY out before going to bed or leaving the area.
- Respect Wildlife – Observe wildlife from a distance and do not follow, approach, or feed animals. Protecting wildlife ensures their well-being and yours.
- Be Considerate of Other Visitors – Respect other trail users. Don’t play loud music, and be considerate of others enjoying the wilderness.

15. And Remember – Mistakes are Inevitable
Becoming a backpacker is a series of trial and error. The only way to get better is to go out there and do it! As long as you are safe and lean into having fun – even your dumbest mistakes become a hilarious story after you return.
Some of the memorable mistakes I made on my first backpacking trip included:
- Not properly adjusting my backpacking pack for several hours – I could have saved myself from some sore shoulders here!
- Bringing makeup. I know 🙄. To each their own, but seriously, you won’t wear it. Bring some moisturizing sunscreen and deodorant if you must and call it a day.
- Not bringing a warm enough sleeping bag. Don’t forget to factor in wind chill when picking your sleeping bag!
- Bring a camping pillow. In an insane attempt to prove how “tough” I was, I decided to just curl up with my clothes as a pillow instead of pack the extra weight. I think my neck still hurts. If you have the space, bring a compressible pillow – you’ll thank me later!
BONUS: The number one mistake I made on my first backpacking trip was…
Not going sooner!
For way too long I let nerves and fear of backpacking hold me back. And it didn’t have to! By building your skills and learning these backpacker tips for beginners, you’ll be a pro backpacker in no time at all.

More Backpacking Adventures
15 Backpacking Tips for Your First Backpacking Trip
The Complete Guide To New Hampshire’s AMC Huts: The Ultimate White Mountains Adventure
Hiking the Trans Catalina Trail: Everything You Need to Know

