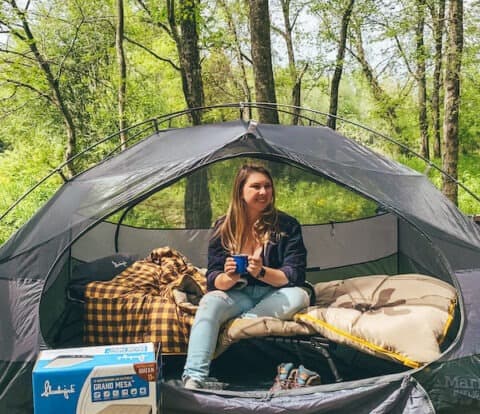
No surprise here, but I’m obsessed with hiking. But you might be surprised to know that I wasn’t always this way. I started my hiking journey in 2014 to cope with stress in law school (and later solo hiking to cope with a s*&% breakup). I still remember that feeling of having no clue what to wear, where to go, and what to bring. In fact, I had absolutely no idea what I was doing, period.
Truth is, hiking for beginners can be intimidating. But it doesn’t have to be! That’s why, after years of hiking (and making LOTS of mistakes myself), I put together this seriously useful guide of 15 hiking tips for beginners.
Keep reading to learn how to find the best trails, what to wear and what to bring, and what NOT to do on your hike.
This post contains some affiliate links, which means if you buy something, my blog will receive a small commission at no extra cost to you. I will never recommend products or links on this blog that I do not personally love.
1. Do Your Research & Start Easy
If you’re a nerd like me, planning is almost as fun as taking the trip itself. Doing your research is the most important step you can take to make sure you pick the right trail for your skill level and expectations.
Beginner hikers should start on easy to moderate trails less than 5 miles long. Once you’ve got the hang of shorter hikes, move up to longer and more strenuous trails.
How to Find Hiking Trails in Your Area: Apps
There are several apps out there for hikers and backpackers, but the most used is probably AllTrails, available on your desktop or from your app store.
AllTrails allows you to search for hikes by location (it’s helpful to already have a general idea of where you want to go). The map feature can use your phone’s GPS location to find hikes and trails in your area.
Data for each trail includes the length of the hike, degree of difficulty, and elevation gain/loss, as well as reviews and photos by other hikers. The comments are a great place to find useful information like recent trail conditions, weather, and parking.
Keep in mind that hiking apps like AllTrails are based on crowdsourced information and may not be 100% accurate. Always double check against official websites and trail signs for accurate mileage and regulations.
Guidebooks
Before a trip, you can usually find me highlighting and bookmarking my favorite guide books, like the National Geographic Guide to National Parks.
No matter where you live, you can find a local hiking guidebook that describes hundreds of hikes to choose from right in your own regional backyard. Some of the books I’ve personally loved include: California Hiking; Exploring Wild Alabama; and 60 Hikes within 60 Miles: New York City.
Blogs
Obviously, I’m biased, but I’m a sucker for a good hiking blog. One of the best ways to find trails is to find hiking bloggers who review and post about local spots, or areas you want to visit. When I was just starting out hiking in Los Angeles, I found local blogs to be a tremendous help for finding some of my favorite beginner-friendly trails, and I still read as many posts as I can before heading somewhere new.
I’ve put together a list of the best hiking blogs, broken down by region, to get you started!
2. Know Your Average Hiking Pace
You’ve picked a perfect 3-mile hike. Great! But do you know how long will that take? Remember, on average, you’re going to hike on trail slower than you walk on a city sidewalk.
On an easy to moderate hike with minimal elevation gain, the average hiker will walk 2-3 miles per hour.
That means a moderate, low elevation 6 mile hike would take approximately 2-3 hours, depending on your pace. But remember, every person is different. Use these numbers as a best estimate and pay attention to your own pace. After a couple of hikes, you will know your own pace and how much time you’ll need for a given hike, depending on altitude and elevation gain.
3. Prepare for Elevation and Hiking at Altitude
One of the most important hiking tips for beginners is learning about elevation gain and altitude. These numbers will have a huge impact on your hike, so it’s important to understand them.
Elevation Gain
Elevation gain is the total amount you will climb in your hike. Elevation loss is the total amount you will descend. The average hiker should estimate adding 30-60 minutes of hiking time for every 1000 feet of elevation gain.
How much elevation gain can you handle? A single flight of stairs is equivalent to about 10 feet of elevation gain. So, a hike with 1,000 feet of elevation gain is equivalent to about 100 flights of stairs.
This is where the length of your trail is going to make a big difference in difficulty.
A trail that climbs 1,000 feet in elevation over 5 miles is generally considered a moderate trail, and likely do-able for a beginner hiker in decent physical shape.
A trail that climbs 1,000 feet over just 2 miles is a significantly greater challenge and would be considered “hard” “strenuous” or “difficult.”
Altitude
Altitude can seriously affect the difficulty of a hike. A 2 mile hike at sea level might hardly raise your heart rate, but that same trip at 11,000 feet will get your lungs pounding.

The reason is that the pressure in the air drops at higher elevations. As a result there is less oxygen to breathe in. Your body is forced to breathe more rapidly to take in the same amount of oxygen.

Heights between 5,000 and 8,000 feet are considered moderate altitude. Most people won’t feel seriously impacted here, unless they are hiking uphill. However, some who are particularly susceptible to altitude sickness can feel the effects at this level.
High altitude extends from 8,000 to 14,000 feet in elevation. Acute Mountain Sickness (AMS) aka altitude sickness can set in starting at high altitude. AMS usually includes mild symptoms like headache, nausea, and shortness of breath. If your plans involve traveling above 8,000 feet, you MUST know the signs of high-altitude cerebral and pulmonary edema and descend immediately if you experience symptoms.
Your experience with altitude will depend on where you live. If you live at sea level you will likely have a more difficult time hiking at higher altitudes than say, someone who lives in Denver, Colorado, at 5,200 feet. Either way, by the time you reach 12,000 feet in elevation, even a set of stairs will probably leave you exhausted.
Your body can adjust to new altitudes within 1 to 3 days. If you don’t have time to acclimatize, expect that even easier hikes may be much more difficult.
4. Understand the Level of Difficulty
Guidebooks, apps, and park agencies will almost always rate the degree of difficulty for hikes and trails. Most rating systems rank the degree of difficulty as Easy, Moderate, Difficult/Hard, Strenuous.
Of course, these definitions are completely subjective – what is “Easy” to a triathlete is “Strenuous” to a small child – but in general you can expect the following:
Easy: Suitable for beginners, children, and older individuals. These trails are generally well maintained, and sometimes paved. Often 5 miles or less with less than 500 feet of elevation gain. Sneakers or Tennis shoes probably OK.
Moderate: Suitable for fit beginners and more experienced hikers. Usually less than 8-10 miles in length and less than 2000 feet of elevation gain. Sneakers or tennis shoes are probably ok.
Difficult: Suitable for experienced hikers in good physical condition. These trails often involve serious elevation gain at a steep incline. Trails may be at high altitude, less maintained, or involve scrambling over rocks or dangerous drop offs. May be more than 2000 feet in elevation gain.
Strenuous: Experienced and well-prepared hikers only on these trails. These hikes are usually long (may be 10+ miles) and/or extremely steep. Strenuous hikes involve significant changes in elevation or other challenging conditions. Trails may be at high altitude, less maintained, or involve scrambling over rocks or dangerous drop offs.
For both Difficult and Strenuous hikes, I would highly recommend wearing hiking boots or hiking shoes with proper support and traction.
5. Be Prepared for Weather, All the Weather
Weather conditions can change quickly, especially in the mountains and desert. Before starting out on your hike, make sure to check the weather forecast at the trailhead, and at the summit if possible. AccuWeather and the National Weather Service are good places to start.
Finding weather forecasts for mountain trails can be a little more tricky. I recommend using Mountain Weather Forecasts to find trailhead and summit conditions.

Remember that weather forecasts are not always accurate. I’ve been caught in several unexpected thunderstorms, even on days that had almost no forecasted chance of rain. That’s why it never hurts to bring extra layers, like a rain jacket, emergency poncho, or warm jacket – just in case!
6. Dealing with Crowds
Since 2020, visitation numbers have been wayyy up at National Parks, State Parks, and local trailheads alike! Chances are, if you’ve heard about a trail, so have thousands of others.
When hiking on weekends, especially during the summer, plan to arrive EARLY. Like, before 8 AM or earlier. Check the comments on AllTrails, where people often share tips for parking and what times the trailhead lots fill up.
It never hurts to have a backup plan if the trailhead parking lot is full.
When sharing the trail with crowds, bring your extra patience, practice good hiking etiquette, and try to remember that everyone is there for the same goal of getting out and exploring nature
7. Leave Your Hiking Itinerary with a Friend
Always make sure that at least one person (ideally two) outside of your hiking group knows your hiking itinerary.

Before you leave, make sure your friend knows exactly what trail you’ll be hiking, and when you expect to return. If an emergency occurs and you don’t check in by your expected time, your friend should contact local park authorities or law enforcement.
Once you finish your hike, don’t forget to check in with your friend to let them know you’re back safely!
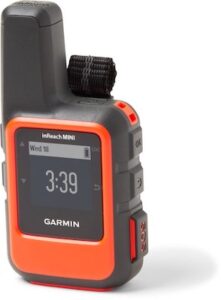
In addition, I recommend having a satellite communication device with an emergency distress beacon to contact search and rescue in case of an emergency. I use always bring my Garmin InReach Mini. The device allows me to send text messages, even when there is no cell service, and the SOS button means I can contact search and rescue in the even of injury, illness, or a disaster. (But remember, only use it in a REAL emergency!). While this little guy is pricey, and requires a monthly subscription, I find the peace of mind is 100% worth it.
Even with my Garmin InReach, I always leave my itinerary with a friend, especially when hiking alone or venturing far into the backcountry.
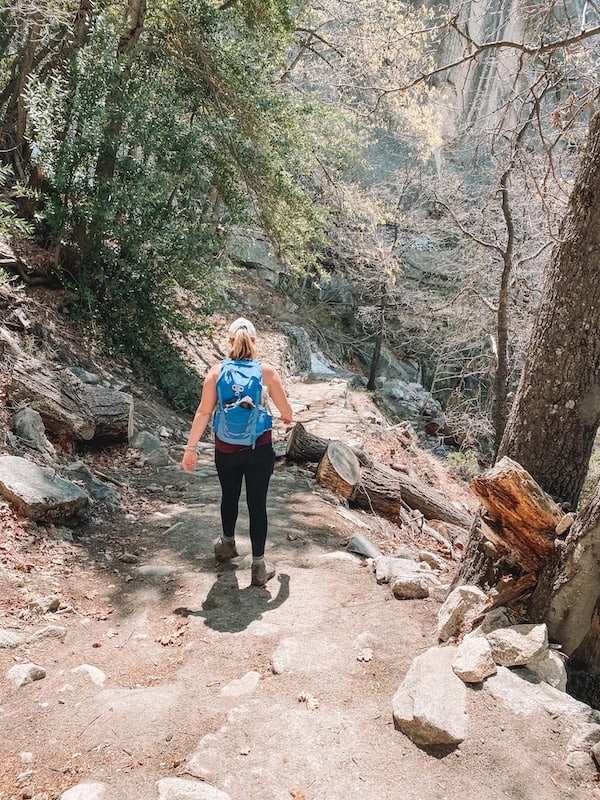
8. Hiking Footwear Tips for Beginners
Most beginner hiking trails don’t require special hiking boots or hiking shoes. If you plan on hiking an easy or moderately-easy trail, a good pair or athletic sneakers will often work just fine! Sneakers should be comfortable and have excellent traction.
If the trail is rocky, unstable, icy, wet and/or muddy, if you expect to hike more than 5 miles, or you just want to be more comfortable, consider investing in a decent pair of hiking shoes.


My favorite hiking boots for beginners are the Merrell Moab 2 Waterproof Hiking Boots and Hiking Shoes. The Merrell Moab is the first hiking boot I ever bought, and I love them to this day! I also use the Merrell hiking shoe on trips where I don’t need additional ankle support.
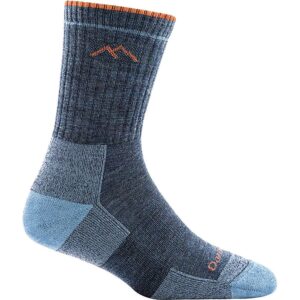
One of my best hiking tips for beginners is that your hiking shoes are only as good as the socks you wear with them! Choose socks that are breathable and quick-drying to reduce moisture and prevent blisters. If your budget allows, consider investing in Darn Tough socks. I’ve never had a blister in Darn Tough and swear by them for all my longest and hardest hikes!

9. Hiking Clothing Tips for Beginners
You can spend a fortune buying specialized clothes for hiking (and believe me, I have) but, as a beginner, anything you wear to the gym or yoga class will usually be just fine!
Stay away from cotton!! Hikers love the phrase “cotton kills.” That’s because cotton retains sweat and moisture, making you susceptible to chills, discomfort, and even hypothermia. Not to mention, you’ll get stinky faster.
Choose clothing that is moisture-wicking, and ideally antimicrobial and UPF rated to protect you from the sun.
The key to staying comfortable while hiking is to dress in layers. Proper layers will keep you warm during cold conditions and comfortable and moisture-free while breaking a sweat.
Hiking Shirts
Choose breathable and lightweight workout tops for your hike. Any moisture-wicking top you bring to the gym will work. Hiking-specific tops are usually made out of moisture wicking and antimicrobial fabrics (to ward off that smell) and some are made with UPF sun protection.
If you’re hiking in summer, consider wearing long sleeves. What? Ok, hear me out. Long sleeve shirts with UPF sun protection (like the SPF rating for your sunscreen) protect you from the sun without the hassle of having to constantly reapply sunscreen on longer hikes. I have very light skin that burn VERY easily, so if i’m hiking in the desert or above the tree-line in the mountains, long sleeves are usually my preference.
The Patagonia Capilene Cool long sleeve shirts, and REI Sahara Shade Hoodie are super lightweight and will protect you from the sun while keeping you mostly cool and comfortable.
When temps are slightly cooler, I love the Kuhl Konstance top, which has an impressive UPF 50+ protection, while providing a little bit of warmth on those mountain summits.


Hiking Pants and Shorts
Wear pants that are lightweight, moisture-wicking, comfortable, and NOT cotton (leave the denim jeans at home). Like your hiking shirts, any pair of pants you would wear to the gym will usually work on the trail.
Pants vs Shorts
Pants better protect your legs from bugs, poison ivy, scratches from plants and scrapes while scrambling up rocks. If it is unbearably hot, I will choose a comfortable pair of running or hiking shorts, like the Vuori Clementine running shorts, or the Kuhl Freeflex Shorts, which also have UPF protection, and I swear are the only shorts I’ve found that don’t ride up on my thighs. 🙌
Leggings vs Pants
Most women already own a decent pair of workout leggings that will work just fine for hiking. (If not, what the heck did you even wear in 2020?) I wear my Girlfriend Collective high-waisted pocket leggings to yoga, to the store, and while backpacking. Most women find leggings to be the most comfortable hiking option, and I totally agree.
Look for hiking specific leggings that are moisture-wicking, anti-microbial, and have plenty of pockets.

The major drawback to leggings is durability. Legging material rips easily when scrambling over rocks (or eating s$%& and falling down on them 🙄), and snags on branches and brush.
Hiking pants are more durable than leggings, and there are now loads of options that are both flattering and durable enough for all your adventures.
The Prana Halle II is a trail favorite, available in both straight leg and jogger styles. I personally love to wear my REI Trailmade pants, and the Columbia Saturday trail pant is a great budget option for hikers just starting out.
Waterproof and Insulating Jackets
Weather can change quickly in any season, so I recommend always bringing an extra warm layer or rain jacket. A down jacket or lightweight fleece will keep you warm when temps drop without adding too much weight to your pack.
If you live in an area that is prone to sudden rainstorms (hellooo, living in the South!) make sure to always pack a rain jacket, even if the forecast only calls for a slight chance of rain. Is rain in the forecast? Consider wearing rain pants, waterproof boots, and bring an extra pair of socks.
In summer, I stick to my North Face Venture rain jacket as my extra layer. In other seasons, I always bring an insulated jacket, like my Patagonia Nano Puff, or a fleece.


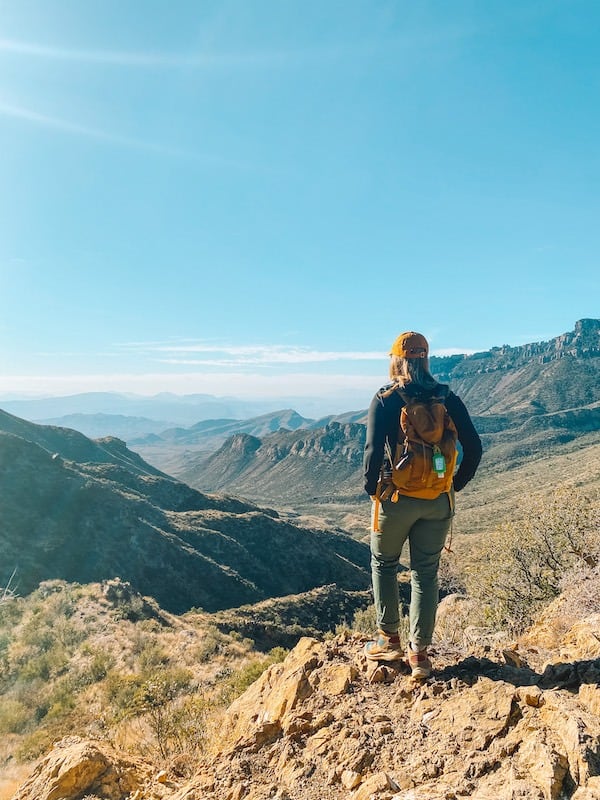
10. Finding A Hiking Backpack
Your hiking daypack will store all your 10 Essentials (more on those in “What to Pack for a Day Hike” below), plus your keys and phone, during your hike.
A good hiking tip for beginners looking to save money is to just use whatever backpack you already have available. Yup, that old school Jansport backpack sitting in your closet will do just fine.
As you become more experienced, consider investing in a proper hiking daypack. I love the Osprey Tempest 20L or the budget and weight-friendly REI Flash 22L Pack. These packs are both lightweight with extra features to stash your gear while remaining comfortable all day.
Learn more about choosing the best hiking daypack, here.
11. What to Pack for a Day Hike
A common hiking question for beginners is, “what do I bring on a hike?” Enter, the 10 Essentials.
The 10 Essentials are 10 small, but life-saving items you should carry in your hiking backpack. Tailor these essentials to your needs and the terrain you’re hiking in.
The purpose of the 10 Essentials are to 1. Prevent and properly respond to emergencies on the trail and 2. Allow you to safely survive a night (or more) outside if necessary.

Think this is overkill? Unfortunately, a recent study says that about 90% of hikers requiring Search and Rescue assistance are day hikers, most of whom became lost when accidentally wandering off trail.
So, what are the 10 Essentials?
The “10 Essentials” to Bring on Every Hike
Navigation: Don’t rely on cell service for directions! Download a map to your phone through an App like AllTrails and/or take a photo of the trail map.
Illumination: Every hiker should carry a headlamp or flashlight with fresh batteries.
Sun Protection: A hat and sunscreen are a must in any season.
First Aid Kit: Keep a basic first aid kit restocked and in your bag at all times.
Gear Repair (Knife, Multi tool, repair tape): Even the best gear can rip or break, and usually at the most inconvenient time. Bring some repair items to keep your gear in one piece, at least until you can get back to your car
Fire: Having a source of heat in severe cold conditions or in an extended emergency can be lifesaving. Keep a match kit or lighter in a waterproof container like a plastic bag.
Emergency Shelter: Temperatures can drop dramatically overnight or during a winter storm. A emergency blankets are cheap, lightweight, and roll up smaller than a can of soda.
Food: For shorter day hikes, a bring small calorie dense foods like granola bars, dried fruits and nuts, jerky or nut butters.
Water: You should carry at least ½ liter of water for every half hour of hiking. More if your hike is strenuous or in hot conditions.
Extra Clothing: Don’t forget a warm jacket and rain poncho – just in case!
Learn more about the 10 Essentials and other important items to pack on your day hike here.
12. Practice Leave No Trace
You may have heard the phrase Leave No Trace – but do you know what it means?
The 7 Principles of Leave No Trace for hikers and campers are easy guidelines for best behavior when exploring outdoors. By practicing Leave No Trace as hikers, we minimize our impact on nature as much as possible, preserving our favorite places for generations to come. All beginner hikers (and experienced ones) should learn these tips and put them into practice.
The seven principles of leave no trace are:
1. Plan ahead and prepare
2. Travel and Camp on Durable Surfaces
3. Dispose of Waste Properly
4. Leave What you Find
5. Minimize Campfire Impacts
6. Respect Wildlife
7. Be Considerate of Other Visitors

13. Wildlife Safety Hiking Tips for Beginners
A common fear among beginner hikers is staying safe from wildlife like bears and snakes. While wildlife encounters do occur, most animals want nothing to do with you (no offense! 😘)
If given the opportunity, most animals try and steer well clear of hikers. However, it is possible accidentally startle or sneak up on an animal while you’re on the trail.
Here are a few helpful hiking tips for beginners for avoiding dangerous wildlife encounters:
Make noise while hiking: Let wildlife know you are coming and avoid startling them. Talk to your hiking partners or sing to yourself if hiking alone (while being respectful of your fellow hikers, of course!)
Watch Your Step: Avoid an unexpected encounter with a snake (and avoid spraining an ankle) by watching your step, especially when climbing over obstacles like rocks and fallen trees.
Give all animals lots of space: If you encounter a wild animal keep your distance. How far? Stay at least 25 yards away from all animals, and 100 yards from large predators like bears and wolves.
NEVER feed animals. Yes, even chipmunks and deer. Animals who associate humans with food may become aggressive towards people, causing serious problems with tragic outcomes.
In general, if you do encounter wildlife, stay calm, and slowly back away. Do not run or turn your back on a wild animal. Remain calm and give them space.
Bears

Take extra precautions when hiking and visiting bear country. Carry bear spray in areas with active bear populations and know you to use it.
Mountain Lions
Most mountain lions will avoid humans; however encounters are possible in some areas. Learn more about staying safe around mountain lions here.
14. Hiking Etiquette Tips for Beginners
We’ve all heard of the Golden Rule, but do you know the golden rules of hiking? Practice these hiking etiquette tips for beginners and you’ll be cruising the trails like a seasoned pro!
Follow the Right of Way
Hikers going uphill have the right of way (they’re doing more work, after all!). If an uphill hiker wants to stop and take a break, be courteous and move to the side, when safe.
When someone is hiking behind you at a faster pace, be courteous and let them pass.
If you are behind a slow hiker, be patient and pass with a polite “excuse me” only when there is ample room on the trail to safely pass.
Don’t forget to say “hello!” Hikers are some of the friendliest people on the planet! A hello, “hey” or quick chat can easily be the highlight of your hike, plus you’ll usually get good tips on the trail from other hikers!
Bikes vs Hikers: Bikers are technically supposed to yield to Hikers but use your common sense on this one. If a biker is going too fast to safely stop or you can safely move out of the way, do them a solid and let them pass.

Horse/Livestock vs Hikers: Everyone should yield to passing livestock. Always follow directions from the livestock riders to avoid accidentally spooking or upsetting their animals.
Don’t Scream or Shout – Unless it’s an Emergency
Don’t Play Music: The fastest way to make yourself the most hated person on the trail is to blast your tunes for everyone to hear. Wear headphone or save the playlist for the car – you’re here to enjoy nature, after all.
Keep your Pup Leashed: On dog-friendly trails, keep you pup always leashed. Even if your dog is friendly, other hikers may have a fear of dogs, allergies, or reactive dogs of their own.
15. Hike Your Own Hike
Hiking isn’t a competition! Don’t sweat it if you’re the slowest or the fastest hiker – in fact many of the best hikers I know are incredibly slow. The only person you’re hiking for is YOU – so hike your own hike
Remember, judgement isn’t one of the 10 Essentials! It doesn’t matter if you like to wear makeup or go full barefaced on the trail, if you like to hike in cute outfits, or go full feral. Being comfortable and safe are your number one priorities.
Don’t Be Afraid to Turn Around
If you only take away one hiking tip for beginners from this list – make it this one: your intuition and common sense are your own best guides out on the trail. Don’t hesitate to turn around if it just doesn’t feel right.
I’ve stopped short of summiting on many hikes, because of weather conditions, my asthma, or because the trail felt too dangerous for me (hellooo, Angel’s Landing in Zion!). “Summit fever” aka the mentality of finishing the hike at any cost can lead to injury, or worse. The mountain or trail will still be there when conditions are more favorable.
Final Thoughts
Hiking is one of the best ways to spend a day. I’m not kidding when I say that learning how to hike changed my life – and I know it can change yours too! Now that you’ve learned my best hiking tips for beginners, you’re ready to hit the trail safely and confidently!
Ready to up your hiking game? Check out more Hiking Basics tips here.